Line Arch Wall Stencil Kit
Line Arch Wall Stencil Kit
Couldn't load pickup availability
Even though it is in our Boho Collection, with a distinct 1920's vibe the Line Arch Wall Stencil Kit would look perfect in an Art Deco interior.
We have added some extra design elements to the lined arch stencil so you can get creative and make your own boho wall art. Or just follow our design in the main product image.
If you just want the line arch stencil then we do sell it separately - Boho Rainbow Line Arch Wall Stencil.
SIZES: Full Arch width of completed design
X Small - 35 cm
Small - 55 cm
Medium - 75 cm
Large - 95 cm
X Large - 115 cm
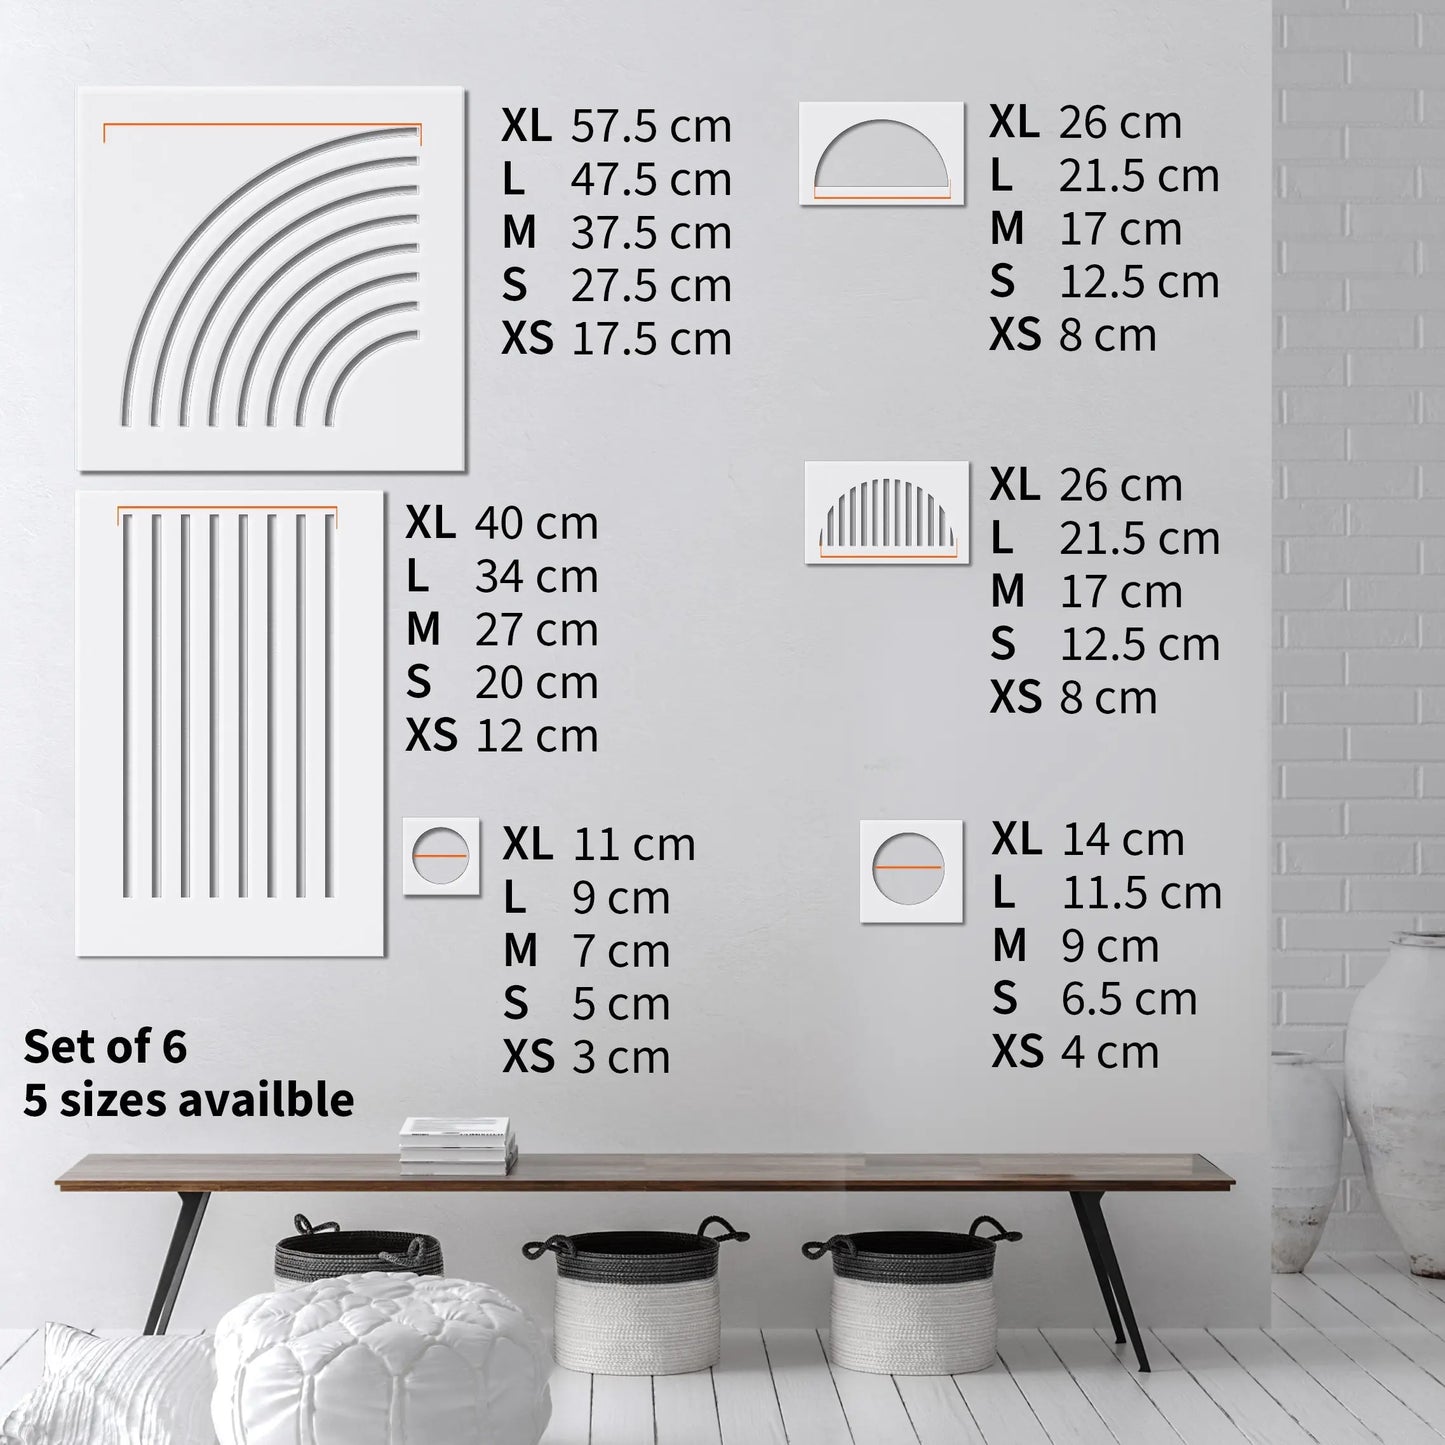
(See images for more individual stencil sizing.)
HOW TO STENCIL
1. Use the lined quarter-circle stencil to create the top of the arch. Decide how high you want your arch to be then position your stencil on the wall using masking tape to keep it in place. Use a spirit level to make sure it is straight.
Apply paint using a small dense sponge roller making sure not to overload with paint and cause bleed. The larger the stencil the floppier it can be, so you may need to hold the stencil down with your fingers as you work to make sure it stays flat on the wall as you apply the paint.
2. Clean the quarter-circle stencil and flip horizontally and use to create the other half of the top of the arch. Align the lines on the stencil to the lines on the wall that you have created, secure with masking tape then apply paint
3. Create the vertical lines of the arch with the straight lined stencil. Again, align the lines on the stencil to the lines on the wall arch you have already painted.
3. Apply the half-circle stencils next, in whatever order you like, or follow the design on the main image. Again, use masking tape to secure the stencil before painting. Make sure the arch paint is dry first, you don't want it peeling away!
4. Lastly, use the circle stencils to finish the design. Et voila! Your very own boho wall art!
Basic stencil instructions are included with each purchase. But please do Get In Touch if you have any questions at all.
The number one mistake most people make when stencilling for the first time is using way too much paint, this leads to bleeding under the stencil, and no one wants fuzzy lines! It’s surprising how little paint you actually need. Apply a small amount of paint to your roller, and then roll off any excess paint on a scrap bit of paper/card. Your sponge needs to be touch dry, so paint only comes through when you apply pressure. The same applies when using a stencil brush. Practice first on some spare paper or card before attempting your project.
PEOPLE MATTER
Share your pics on our Facebook group – a community where customers share their projects or come to get inspiration or advice. Or find us on Instagram and share there too!
We’re big on giving back, and place the highest value on our customers. Providing great customer service is the backbone of our business. If there is anything you need, anything at all, please do Get In Touch.
Share


