Boho Arch Wall Stencil Kit
Boho Arch Wall Stencil Kit
Couldn't load pickup availability
Arch colour blocking is all the rage now for boho interiors which is why we have been busy little ducks creating our very own Boho Stencil Collection
A colour block arch on its own is really popular but why not jazz it up a little. We have added in a sun stencil and a trailing leaf stencil so you can create your very own tropical boho feature wall! Use behind a bed for stunning a headboard effect or behind a sofa or nursery cot.
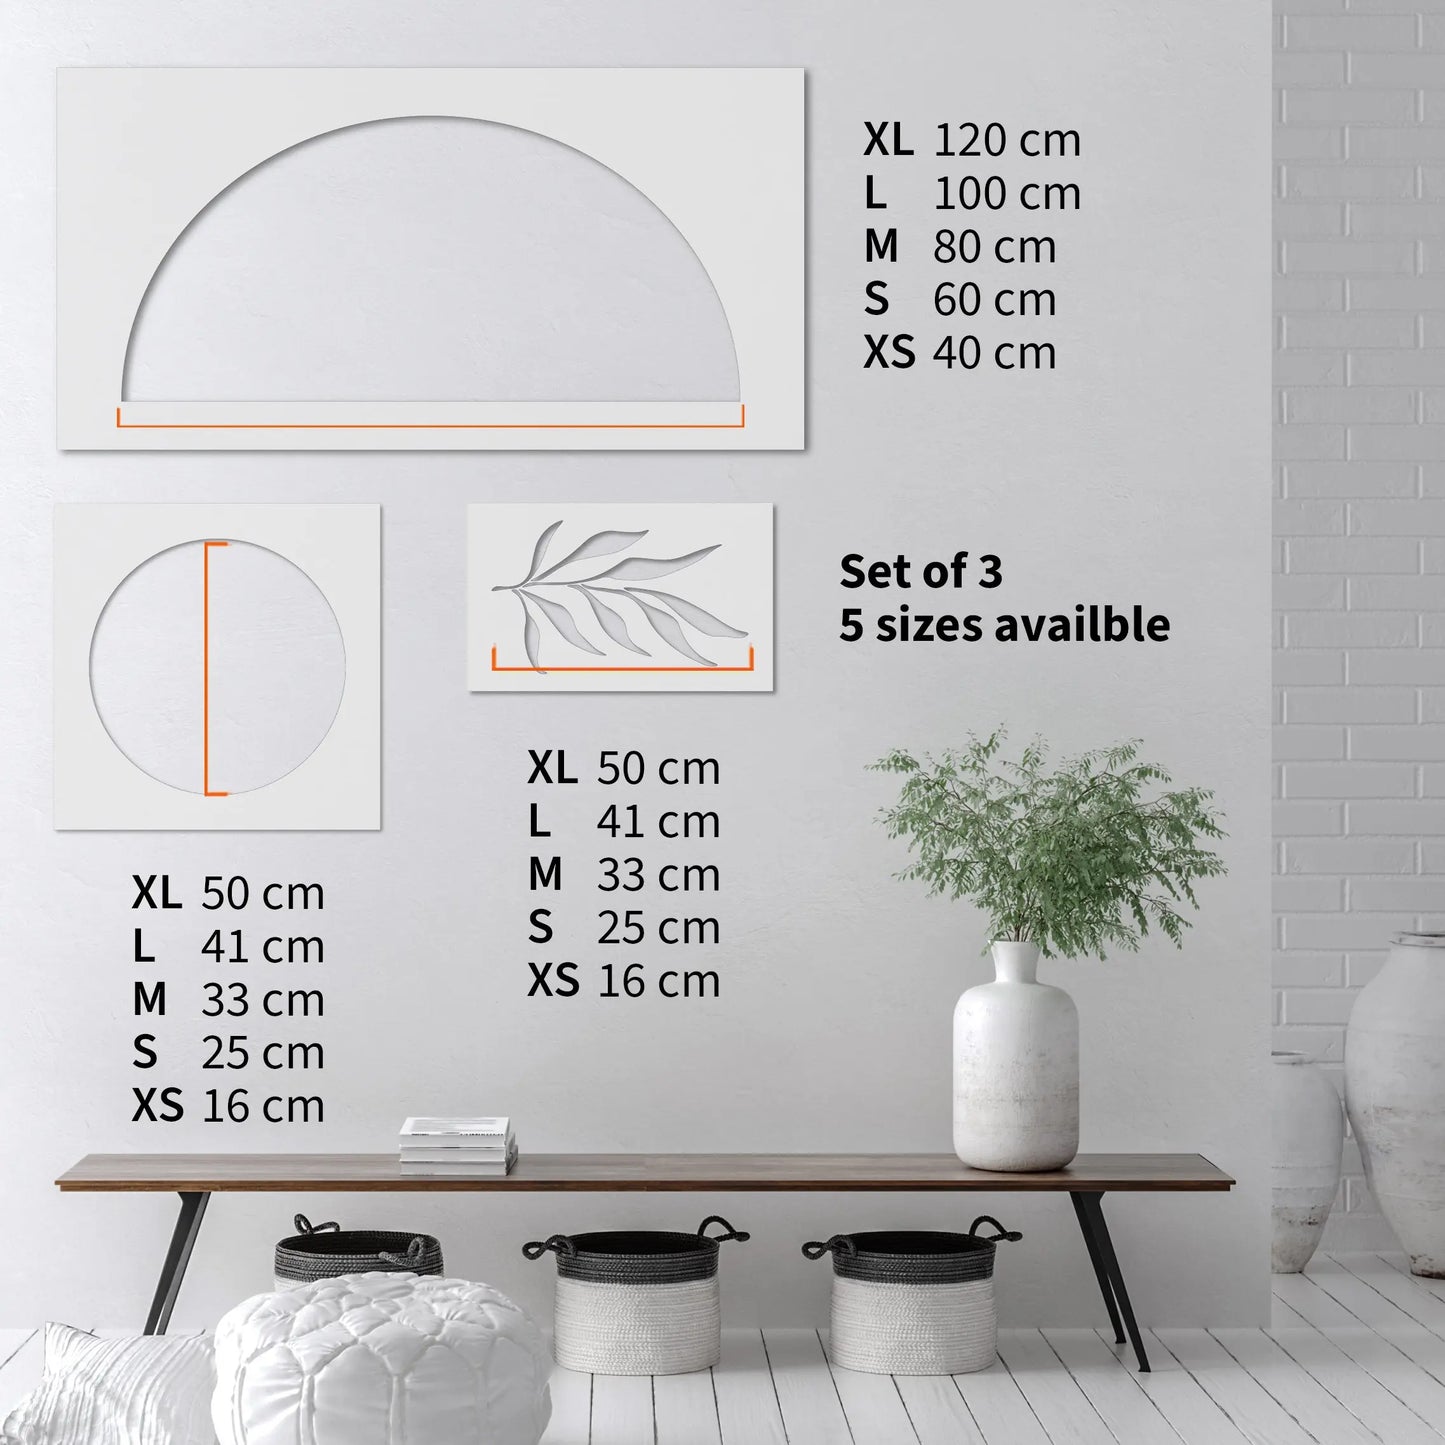
SIZES: arch widths
X Small - 40 cm
Small - 60 cm
Medium - 80 cm
Large - 100 cm
X Large - 120 cm
(See images for more individual stencil sizing.)
HOW TO STENCIL
Tutorial video coming very soon in the New Year! But for now...
1. Use the large semi-circle stencil to create the large arch first. Decide how high you want your arch to be then position your stencil on the wall using masking tape to keep it in place. Use a spirit level to make sure it is straight.
Apply paint using a small dense sponge roller making sure not to overload with paint and cause bleed. The larger the stencil the floppier it can be, so you may need to hold the stencil down with your fingers as you work to make sure it stays flat on the wall as you apply the paint.
2. Apply the sun stencil next, again using masking tape to hold in place. Make sure the arch paint is dry first, you don't want it peeling away!
3. Lastly, use the leaf stencil to create a trailing pattern either coming down from the ceiling or out from the side of the wall onto the arch. Again, make sure your base layer is dry before using masking tape.
Basic stencil instructions are included with each purchase. But please do Get In Touch if you have any questions at all.
The number one mistake most people make when stencilling for the first time is using way too much paint, this leads to bleeding under the stencil, and no one wants fuzzy lines! It’s surprising how little paint you actually need. Apply a small amount of paint to your roller, and then roll off any excess paint on a scrap bit of paper/card. Your sponge needs to be touch dry, so paint only comes through when you apply pressure. The same applies when using a stencil brush. Practice first on some spare paper or card before attempting your project.
PEOPLE MATTER
Share your pics on our Facebook group – a community where customers share their projects or come to get inspiration or advice. Or find us on Instagram and share there too!
We’re big on giving back, and place the highest value on our customers. Providing great customer service is the backbone of our business. If there is anything you need, anything at all, please do Get In Touch.
Share