

I'm going to give you a step by step run down on how I went from this to this!
This was our dining room when we first moved in. It hadn’t been touched since the 90’s.
That fireplace just had to go and the woodchip too, it was everywhere! 😬

Those walls took some stripping. But off it came, with most of the plaster too! 🙄
Check out the original fireplace, this was where the old range cooker was housed.
It’s hard to see on the photo but it is so tall and grand, albeit a bit lopsided though 🥴

Now I’m a very lucky girl as my Dad is a plasterer and a bloody good one to boot! 👌
He soon sorted out my dodgy lopsided fireplace.

A few years back I was given an old shelf and a pair of corbels which I’d stashed for a rainy day such as this one! A perfect mantle for my new fireplace.
I scoured Pinterest and loved the simplicity and grandness of this fireplace.

So, I commissioned my amazing totally talented joiner, Frank, to knock up something similar 🔨🪛
He used MDF board and moulding strips to create a fireplace surround for my corbels and mantel to fix to.
Eek…so exciting! It was all coming together nicely.

I roped in the hubby and got him to even out the cracks on the hearth. We used ready-mix concrete and applied it with a trowel, smoothing and levelling as much as possible.
It didn’t have to be perfectly smooth as the stencilling will disguise a lot of the lumps and bumps.

Time for a bit more prep work. Sanding surfaces before you apply primer or paint is a must. Never skip this step if you want a nice smooth durable finish.
I used an 80 grit sandpaper on the concrete hearth to get all the major lumps and bumps smoothed out. Then used a finer 120 grit paper to give a smooth surface for my primer to go on.
The fire surround, corbels and mantel were also sanded and smooth with a 120 grit paper.

Bulls Eye 1-2-3 Multi Purpose Primer is my go-to primer. It’s water-based, so easy to clean and quick to dry. It is also a stain blocker which is great for water stains or when painting old stained wooden furniture.

A couple of coats of primer to the hearth and the fire surround and it was beginning to take shape!
That MDF is thirsty stuff! I think I gave that another 2 coats for good measure!

It was now time to paint the whole thing! I used the same colour, but with two different paint types.
For the fire mantel and surround I used Jasmine White Wood and Metal Eggshell, to match my skirtings and door frames.
I used Jasmine White Wall Emulsion paint on the hearth as it was going to be stencilled.
Apply as many coats as is needed to get a good solid colour.

When stencilling it is always a good idea to apply a matt emulsion base coat on top of your primer.
Primers can have a slightly shiny finish.
This can lead to paint bleeding under the stencil and the paint not drying fast enough.
The paint just ‘sits on top’ of the sheen rather than absorbing into it.
Now the painting was done it was time to stencil…tres exciting! 😃

I designed a new stencil just for the job! The Bisira Faux-Tile Stencil with grout line to make it look like real tiles.

Now I didn’t want to make this blog too lengthy and bore you all to death!
If you want to know how I stencilled the hearth in more detail, then head over to Marie’s DIY Stencilled Faux-Tile Fireplace blog.
I explain how I worked out what tile size to go for and lots of useful tips and tricks when stencilling a hearth.
Once all the stencilling was finished, I applied three coats of Heavy Duty Polyvine Extreme Varnish to seal all my hard work.
Then cue the hubby (aka Sean) again! This time to fit some wooden trim to cover the ugly area around the hearth.
We bought the wooden trim from B&Q and choose a simple right-angle profile. This suited the lip we had between the floor and the hearth.

Sean used a saw to cut the pieces to fit and a mitre block to create the 45-degree angles needed for the two corners 🪚
Just take your time if you have not done this kind of thing before, double check your measurements and angles every step of the way! Or better still, get a handy friend to give you a helping hand!

Once all the pieces were cut we gave them four coats of Jasmine White Eggshell paint.
We used wood glue to fix down and weighted in place while the glue dried. Basically using anything to hand, a pile of books is ideal! 📚

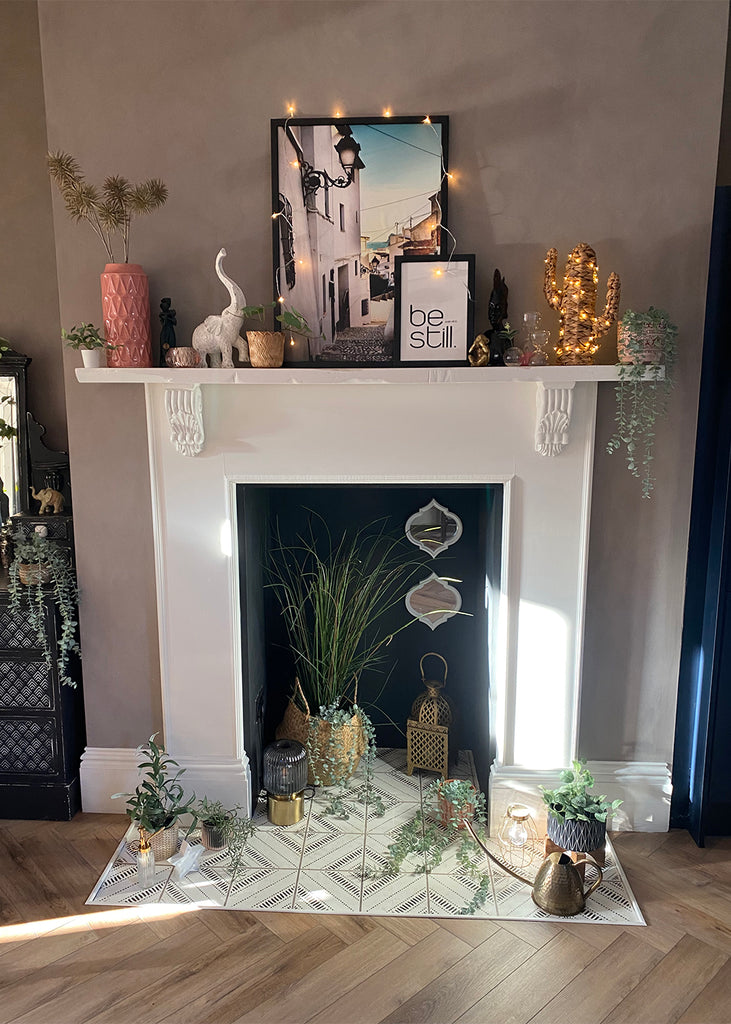
Nearly there…all that was needed was to dress the space and it was job all done!


