
We went from this….

To this….👏

In this blog I’m going to share in detail how I created the stencilled splashback.
If you want to know more about the actual renovation of the space, head over to my other blog: Marie’s Kitchen Makeover.
So, this is where the inspo came from. I found this pic on Pinterest and so wanted this look.

We actually sell a stencil with that exact wall tile design, the Florence Faux Tile Stencil.

As I had a large space to cover, and to speed up the project, I opted for a 6-tile repeat stencil.

Standard wall tile sizes come in 4”, 6”, 8” or 12” sizes, which we offer with our Faux Tile Stencils. I chose a 6” (152 mm) tile size.
So, this was the space we started with just before the stencilling began.

The first thing to do was paint the basecoat colour. I used some Downing Street Valspar matt wall emulsion paint (form B&Q) that I already had left over from another project.
Before getting carried away and slapping paint on the wall, I had to think about:
- how high my shelves would be
- how many full tile patterns would fit in the space
I gaged by eye 👀 roughly where I would want the shelves to be then measured the height. I knew I could go anywhere between 60-70 cm high.
That meant I could fit 4 full tile patterns in the space (152 x 4 = 608 mm).
The finished height would be a little more than that after taking account of the spacing in between the tile patterns and the gap at the bottom, so I allowed for another 5 cm (50 mm).
In several places around the wall, I drew little pencil lines 66 cm up from the worktop, as a guide for painting the basecoat.

Don’t forget to loosen any sockets from the wall so you can get a nice clean painted finish! 👌

Stencilling onto a satin or sheen surface is a nightmare! The paint just sits and slides on the sheen surface and bleeds under the stencil.
So we always use a matt emulsion for both base coat and stencilling.
Using a paint brush and the pencil marks as a guide, I painted 3 coats of Downing Street matt emulsion wall paint on the walls.

Now time for the stencilling!
Again, don’t rush into it. Think about where you are going to start and how you are going to move out from there.
I decided the best place to start was at the bottom of the wall. That meant cutting one side of the stencil so it would fit flush in the space.
The other alternative would be to bend the stencil but that would have been a lot trickier to roller the paint to the edge as neatly.

I was putting a small wooden trim around the edge of the worktop, so the tile pattern didn’t need to be right to the bottom of the wall.

Hold the stencil in place with some decorator’s tape on the corners and use a spirit level to make sure the stencil is level.

A small dense foam roller is best to do the majority of the stencilling. It is much quicker than using a stencil brush or sponge which are more useful for getting into the edges and corners.
To be honest, it’s useful to have all 3 for a project just to cover all bases!
Whatever you use, don’t forget…less is more! Don’t overload with too much paint. Roll/brush excess paint onto a spare piece of card. It should be nearly touch dry.
It is worth practicing your technique first on a spare part of the wall or on some paper or card.
For a more solid looking colour you just keep building up the thinner layers of paint to avoid the paint bleeding under the stencil.

Stencil one done! Overlaying the stencil onto the previously painted area, I repeated the pattern up the wall.

All our Faux-Tile Stencils have handy repeat parts of the pattern so you can easily overlay the stencil to complete the pattern evenly. 👍

Repeat, repeat, repeat! I just kept going, stencilling the pattern across and up the wall.
Although, I did get the Hubby to take over as his stencilling technique is much better than mine. He has a lot more patience! 😂
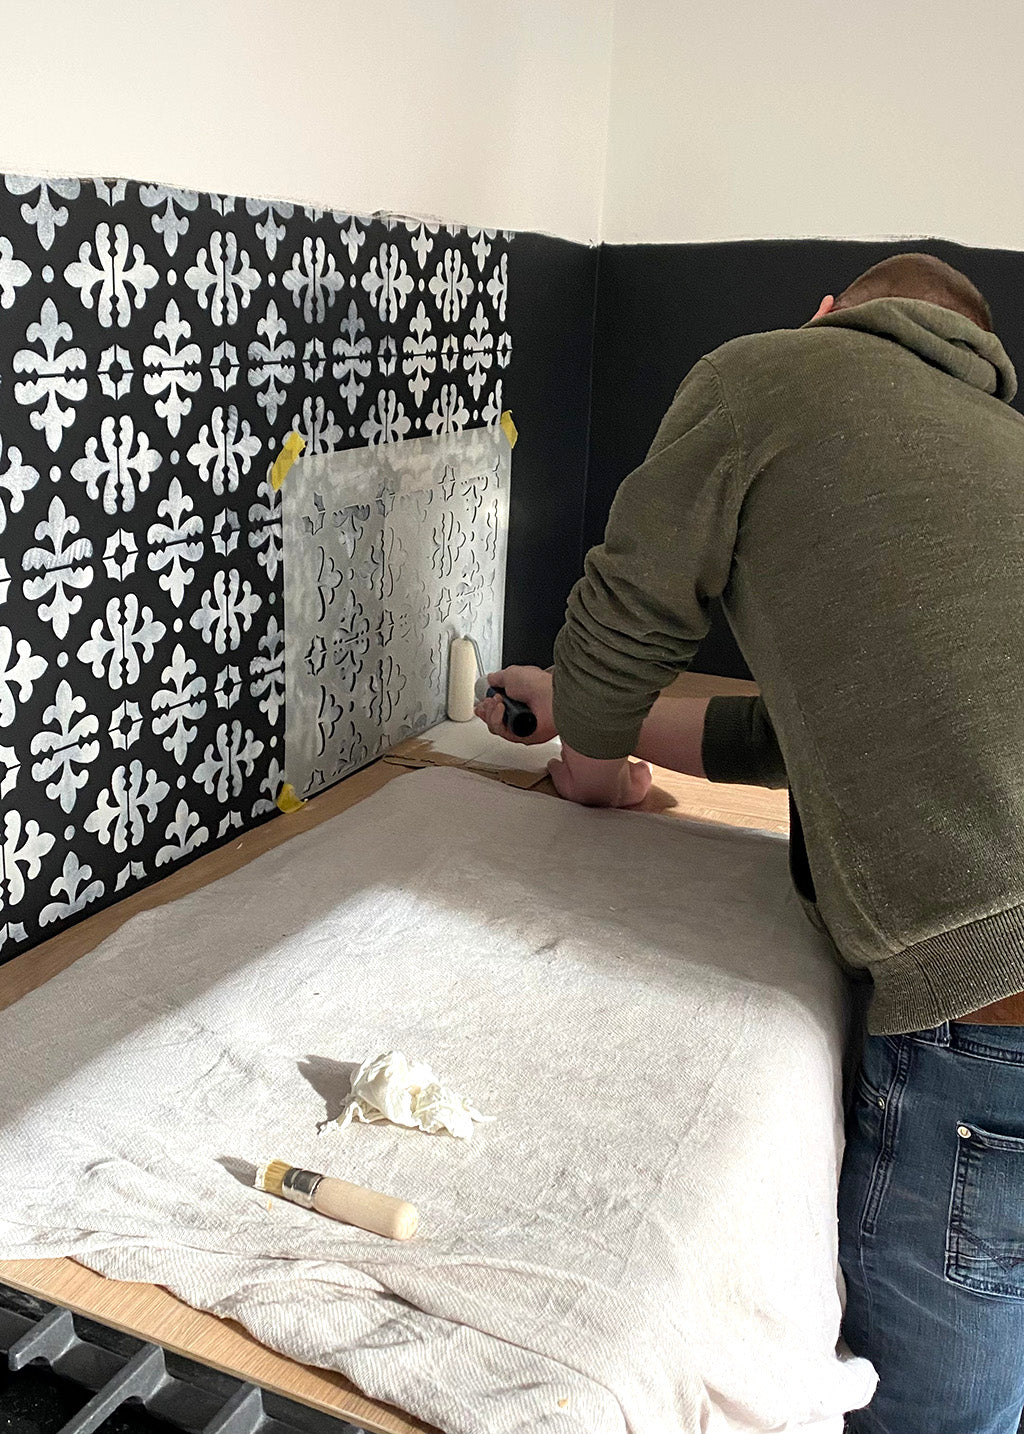
Edges and corners are a little trickier to stencil. We wanted the tile pattern to continue evenly into the corner of one wall and out onto the adjacent wall.
So, we aligned the stencil onto the previously painted pattern and secured in place right into the corners. Then used the roller to stencil as far into the corner as we could.

We removed the stencil and realigned so most of the stencil was on the adjacent wall.
Again, stencilling as far into the corner as possible.

We repeated this process for all edges and corners and left the more awkward areas till last, such as right into the edges and around the sockets.

So, time to cut the stencils to get into those trickier areas! We started with the sockets. ✂️
I had actually got 2x single tile stencils as well as the larger 6-tile ones, so I used these for the sockets.
We could still use the roller here as the sockets were away from the wall.

2 sockets all done! Time to tackle the edges. For these we cut the larger 6-tile repeat stencils.
Always make sure you start with your smallest cuts first so you don’t end up with no stencil left!
Luckily we didn’t actually need to cut the stencil for the corner. Phew!

For the edges into the cupboards we did need to cut the stencil.
We measured the space that need to be filled, marked it on the stencil and cut.
The piece fit perfectly! 👌

Putting a piece of decorator’s tape on the cupboard helped us get right into the edge without getting paint on the cupboard.
Also, a Stencil Brush or Sponge Dauber is more useful here than a roller to get right into the edge.

Stencilling is not a perfect science and there is a hand painted element to it, so you will have areas that need touching up.
A fine artist brush is perfect for the job. 🖌️

We also noticed on one edge where we’d cut the stencil we’d lost part of the pattern. 🤦♀️ Ooops!

A bit of masking tape and some touch up paint sorted it out and give it a nice clean edge finish. 😃

We weren’t too bothered that the pattern didn’t go right into the edge. You don’t notice that in the grander scheme of things.
As long as the edge is neat, that's the main thing!

All touch ups done and now time to seal all that hard work so it is wipeable and waterproof.
I used Polyvine Extreme Heavy Duty Varnish (bought on Amazon Prime) and applied 5 coats following the manufacturer's instructions.

Now comes my favourite part…dressing the space!
I sourced my shelves on etsy and wanted to buy from a small business.
I was super stoked when I came across CedarAndSawdustUK run solely by Anna-Marie and she only lives down the road from me too!
These are her shelves...bloomin' gorgeous! 💗

Anna Marie was so lovely and helpful getting the right colour I wanted. I couldn't have asked for better customer service! 😁
We Dizzy Ducks are all for supporting small local businesses, so winner all round! 🙌
I bought some crockery, cups, glasses etc from Dunelm Mill.
Throw in some plants 🌿🍃and other decorative bits and bobs, et voila…all done!


What do you mean they're not tiles! 😲

