
Myself and Jasmin love a good stencilling project so when Pete said he wanted to stencil his bathroom floor we were more than happy to help out! 😃

Pete had already prepped the floor and applied a couple of coats of primer as a basecoat.
All we had to do was the stencilling.

Pete loved the geometric Oriental look of the Belmont Hexagon Wall and Floor Tiles.
We already had our eyes 👀 on this design some time ago as a stencil idea.
The tiles can be laid in numerous pattern ways but we chose the one we preferred and our Yasugi Faux-Tile Stencil was born! 🙌

All our Faux-Tile Stencils come with repeat markers on the stencil so that the pattern can be easily and accurately repeated across your wall or floor.
Simply overlay and align the stencil over previously stencilled pattern and away you go! Repeat, repeat, repeat!

We met Pete through an interiors networking group called No House Rules, based in Leeds. He’s such a lovely warm and fun guy, crazy for all things interiors!
Pete is a fully fledged interior designer with a classy contemporary style that we just love. ❤️
His home is to die for! You can have a good goosey gander on his website, SpaceMaker Interiors. Or check out his Insta account: @thespacemaker_interiors

So, you’re wondering what is going on with the hairdryer?! Well, word of warning peeps.
Don’t rely on your primer as being your base coat to stencil on!
Primer once applied usually has a slight shine/sheen to it and trying to stencil on a sheen surface is a tricky business, as we found out! 🙄
The paint tends to ‘sit on top' of the primer rather than absorb into it.
This leads to paint bleeding under the stencil and not drying as quickly.
Hence the hair dryer to speed things along!
This is why we always recommend applying a matt emulsion base coat after applying primer.

We started stencilling from the middle of the floor and worked our way out to the sides, using a small dense foam roller.
Always leave the sides and tricky edges until last.

You can bend the stencil into the edges and use a little sponge dabber or small Stencil Brush to do the stencilling.

Or you can cut the stencil instead if you prefer. ✂️
This is why we offer a 2-pack option on the majority of our Faux-Tile Stencils.
And we offer 15% discount on 2+ items and a 20% discount on 4+ items.
It's always good to have spares to cut up at the end and make your life easier!

Cutting a stencil is particularly useful for really awkward areas such as round the toilet basin.

Another handy tip is to have some fine artist brushes to hand. 🖌️
You can use them to fill in parts of the pattern, keep a steady hand though!
But don’t worry, if any mistakes are made simply paint over it and start again, no sweat!

We put a lot of hard work into Pete’s floor, but it was so totally worth it.
You’ve got to agree the finished effect really does look like tiles.👍
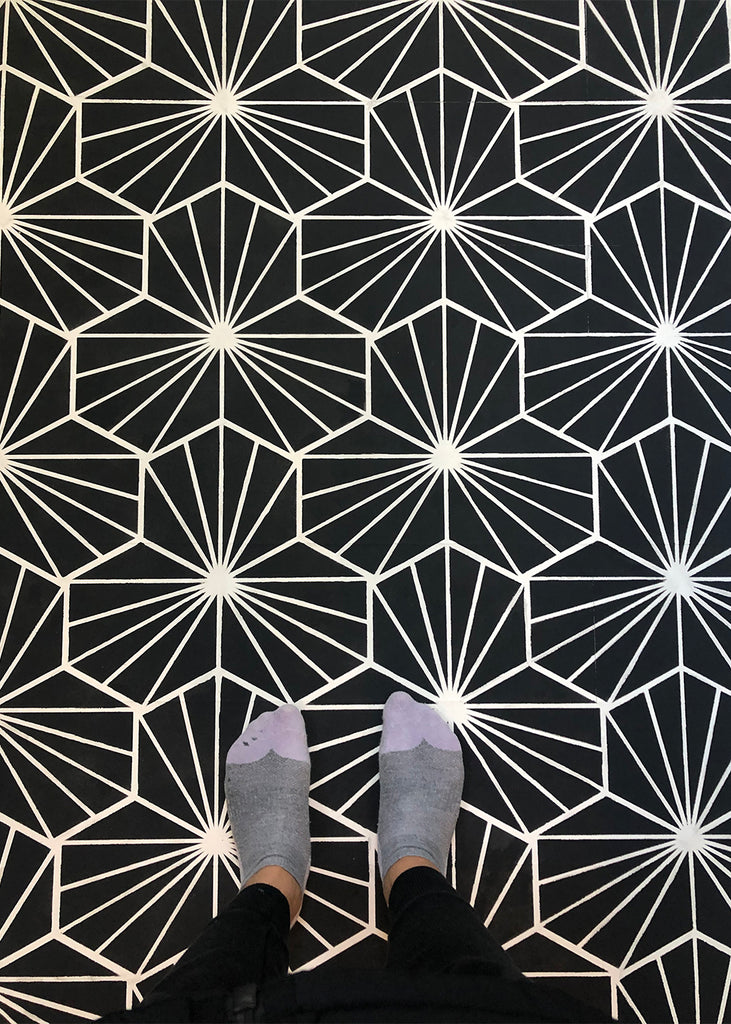
Stencilling is a much cheaper alternative to laying actual tiles, but I won’t lie…if you want a good realistic finish then you really need to put in the work.
Pay attention to detail and make sure your stencilling is neat and your edges are finished properly. It really does pay off and looks so impressive once done.
Yup, they really do look like tiles! 👌

2 comments
I stenciled the back of my fitted wardrobes. So when they are empty it gives a really finished looked. Not the greatest but I’d love to do my patio where would I start😳
That floor looks stunning! Can I ask what black paint you used and did it need any kind of sealant over the top as it is in a shower room? TIA x